|
Introduction
This tutorial will teach you how to
make build pictures without needing any knowledge of a renderer or of
a 3d modeler. Obviously, the results arent as good as if it was done
inside a program like Lightwave by someone who knows what he's doing
but for ppl like you and me who want a really nice build pic without
the hassle of learning a professional rendering package, this is THE
solution. I'd say that with a bit of creativity, time and Photoshop
skills, you can do just as good. Once you've got the process down, you
can create a build picture like the one I did (scroll to the bottom)
in about 5-10 minutes. With more time, you can do way better obviously.
Part 1 : MilkShape 3d
editing
First, you must import your unit
to MS3D (Milkshape 3d), to do this, you need the plugin 3do
to MS3D importer. Follow the install instructions in the
Readme.txt and then import your unit (Files->Import->Total
Annihilation 3do...). For
the purpose of this tutorial, we'll use the Krogoth, so import
it now. It should look like this : 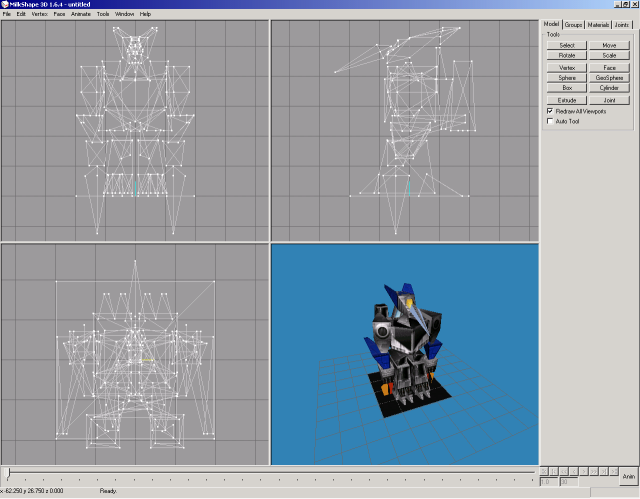
It
looks pretty nifty but before we get to the rendering part,
there's a thing or to that must be done. First, the flares and the
ground plate must go. In the "Model" tab to the right,
pick "Select" and enable "Face" as your
selection type. Make sure "Ignore backfaces" is
unchecked "By Vertex" is hecked. It should look like
this : 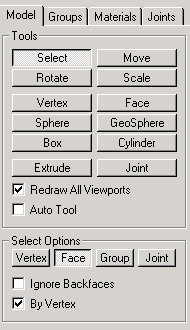
Now
just select the ground plate triangles in on of the side views.
Drag a selection rectangle around a part of the face you want to
target and it should select it. You can use the shift key to
select faces in more than one operation. Once you've selected the
target faces, just hit delete to make them disapear. Destroy the
ground plate and the head/arms flares this way. Here's the result
: 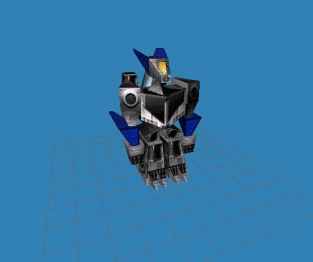
It's
looking good but it would be even better if we could get it to
take a more dramatic pose. The model Tab to the right contains
many different options, like move, rotate and scale. Just pick one
and it will affect all the selected faces/vertex. I started with
the head, I wanted to give it a little tilt to the front and to
the side. It was pretty easy to select via the side view : 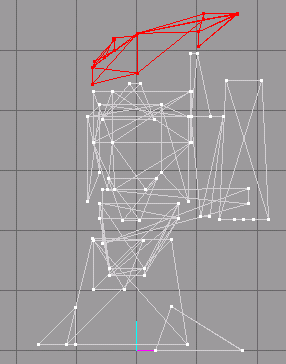
Rotate
it a bit towad the bottom and a bit on the side. After that, I
selected the arms. Those are a bit more tricky, since I'm not very
good with MS3D, what I did, was to go into the "Joints"
tab, find the corresponding bone and pick "SelAssigned"
to select the correspong vertexes. The problem is that I dont know
how to select more than one bone at a time, so you'll have to do a
bit of work to get the lower arm into position after having moved
the upper arm. My end result looked like this : 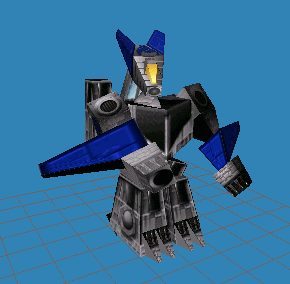
To finish, export your model to
Wavefront Obj format (File->Export->Wavefront OBJ). Be sure to
save it in the same directory as your .3do since the texture generated
for your unit is saved in that directory.
Part 2 : Viewpoint
Editing
For this part,
you'll need 2 programs and a plugin : Viepoint
Scene Builder, Viewpoint
Media Publisher and Viewpoint
Browser Plugin, just click on the names to download them. Start
by opening Viewpoint Scene Builder. Load your model by clicking on
"Add OBJ" in the "Scene Commands" to the
right. Here's what it should look like : 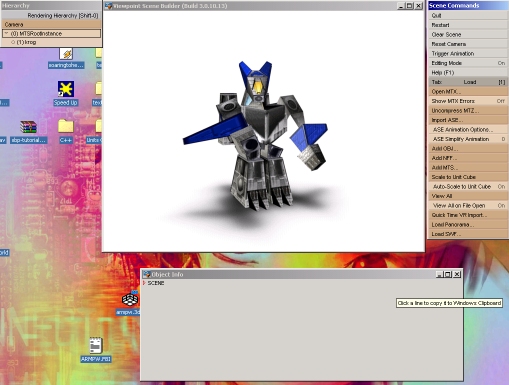
Place
the krogoth anyway you like, it really doesnt matter, the posing
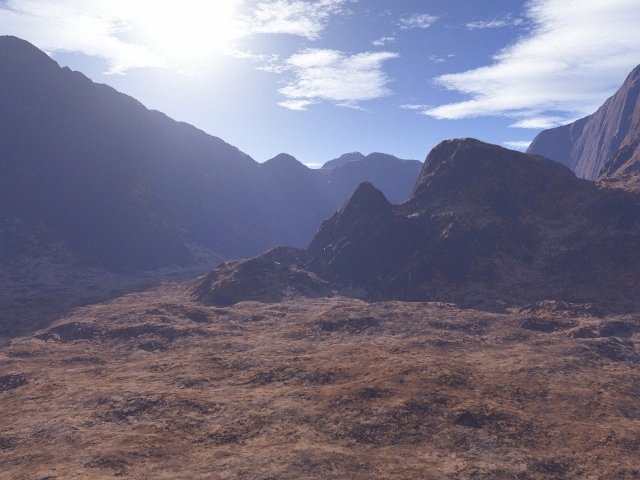
will be done later, now add a background to your scene. Click on
"Load Panorama...", pick a Flat one and choose a
background you like. For this tutorial, I picked this one : 
(Click
to enlarge) Here's
the result, note that when you move your unit around, the shadows
seems to follow the bumpy ground as if it was rendered to take
it's height into account? That's because the shadow is blended on
the background. 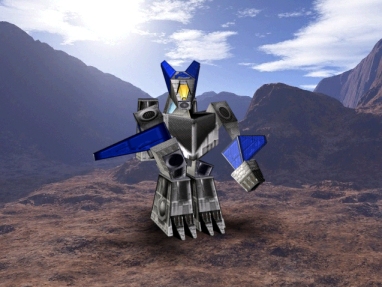
Now,
we must save out scene, go into the "Scene Commandes"
and click on "Tab : Load".
A menu should appear, pick publish. In the new menu, click on the
"Publish" button toward the bottom and save it under the
name you like. Open
up Viewpoint Media publisher and enter the Widht/Height of your
background picture. If you dont, the background will be distorted.
Click on select Mtx/Mtz and pick your scene. It will ask you the
name of the HTML file you want to generate, again enter something
you like, ie : Krog.html. 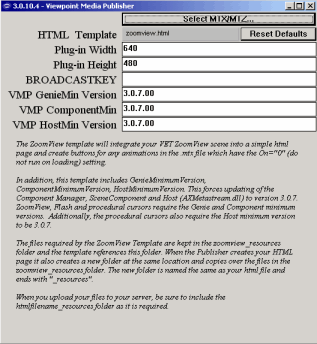
Now,
open up the .html file you generated with your browser. Now, place
the krogoth where you want it to be. Hold the left button to
rotate it around, the right button to zoom in and out and the left
and right button simultaneously to move it around on the x, y
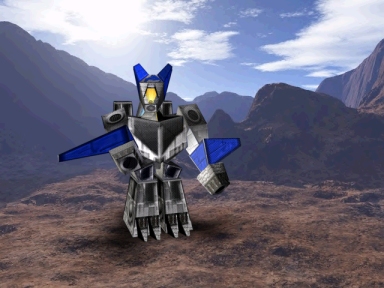
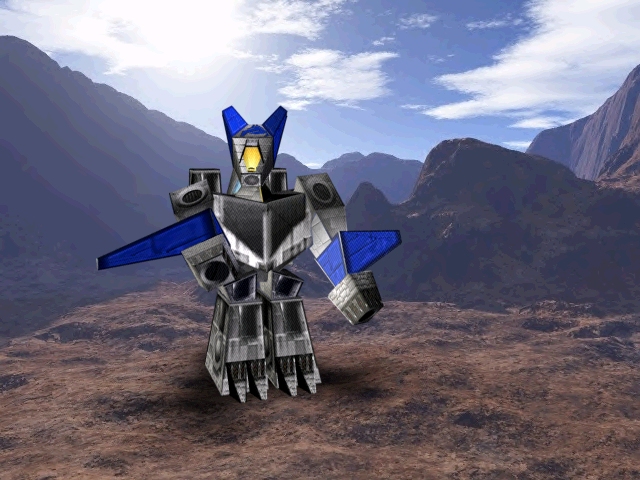
axis. Here's the final pose I picked : 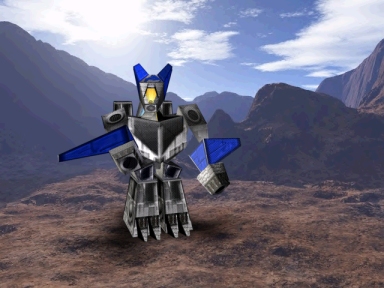
Now,
you might've notice that there's a problem, the right arm has a
hole in it. You can fix that easily in any photo editing program.
Personaly, I used Jasc Paint Shop Pro. Select the hole with the
lasso tool, with point-to-point settings and antilias checked
(options in the Tool Options). 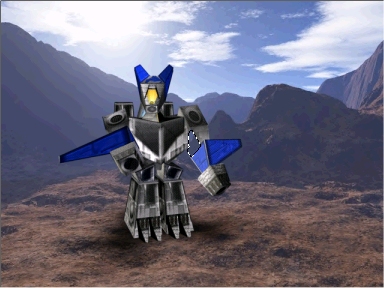
Now,
open the .bmp containing the Krogoth texture (corkrog.bmp), select
a metallic texture that look like it should go there and copy
paste into a new image. Personaly, I used this one : 
Now,
use the flood fill tool, with the tool options set at :
-
Blend mode :
none
-
Match mode :
none
-
Opacity : 100%
Click on the
foreground style to the right, hold your mouse button till a menu
appear and choose the pattern fill (third from the left). Now,
double click on the foreground style. The pattern menu should
appear. Change the current pattern to your metallic texture and
set the angle to something matching your current pose. Click ok
and apply the flood fill to the area.
It looks decent but
it's still a bit too bright, it doesnt fit, you need to adjust the
brightness. Go into Color->Adjust->Brightness/Contrast. Set
the Brightness to -30 and the contrast to 0. Here's the final
result :
For the build
picture, I just cropped the image and bit, resized it to 64x64 and
then applied the sharpen more filter. The final result in TA color
palette is :

Obviously, I didnt
take much time to pick a background and create a pose. For a real
build picture, I recommend you take a little more time for that,
but the sky's the limit. At any rate, I think it still turned out
pretty well.
On a side note, I
HOPE you realised the potential for displaying your 3rd party
units on the web in full 3d using the import plugin and the VET
tools. It's a pretty nice possibility to have your units in 3d on
the web.
|